
Post Exploitation
Network Scanning
.png)
Network Scanning via ARP Scan
Using the "run post/windows.gather/arp_scanner" command, we will be able to perform an ARP scan on the victim machine. This helps us discover all the other machines on the same subnet as the victim, which could allow us to traverse and perform a pivoting attack on another device.
Disabling Windows Firewall
.png)
Firewall Enabled
The default Windows Firewall is currently enabled for Private Networks.
.png)
Checking state of firewall
In meterpreter, we can enter the Windows shell using the 'shell' command. Afterwards using the command 'netsh firewall show opmode', we can view the state of the default firewall. As we can observe, the firewall is enabled for the current configuration.
.png)
Checking state of firewall for private networks
Using the command 'netsh advfirewall show privateprofile', we can view the state of the default firewall for private networks specifically. The value for state is currently 'ON'. We will have to change that.
.png)
Disabling the firewall
Using the command 'netsh advfirewall set privateprofile state off', we will disable the default firewall for private networks specifically.
.png)
Firewall Disabled
The default Windows Firewall is now disabled for Private Networks.
Ensuring Persistence
Backgrounding session
Firstly, we will send the current to continue running the session in the background in order to allow the service persistence module to be executed. We would then execute the "exploit/windows/local/persistence" module to create an executable application at the compromised machine.
.png)
Module configuration & exploitation
Now set the session to the previous background session (initial exploitation) and set the lport to any number and take note of the port number set as we will be using the same port number "5678" later.
After the above configuration have been made, run "exploit", the executable was shown to be saved under "C:\Windows\TEMP" folder, with the executable name "wJhxC.exe"
.png)
Creation of persistence file
Head over to the victim machine and navigate to the file path shown to check that the executable application created was stored in the same file path shown.
.png)
.png)
Creation of persistence file
After confirmation, proceed to run the "windows/local/persistence_service" module as a background session to allow another module "exploit/multi/handler" to be executed.
This module would allow the executable payload created in the previous session to run each time a user logged into the compromised machine. Thus, if the payload runs, a meterpreter session would be opened again for each user session. Hence, persistence is ensured.

.png)
Final step
Since Windows Server 2008 is already up and running in VMware WorkStation, our team decided to restart the server to demonstrate that persistence is present.
Hence, as shown in the screenshots, the Meterpreter session died (Meterpreter session 1 closed. Reason: Died) when the Server was restarted and as soon as the Server is up, the Meterpreter session reopens.
Enumerating Users

We used the enum_logged_on_users module to list the users that are currently logged on as well as those that recently logged on. We can observe the SID of these users.

Stealing Credentials
To steal credentials, we have a few approaches we can take.
Here are a few of them:
-
Cracking Password Hashes
-
Capturing keystrokes
Cracking Password Hashes
.png)
Modules involved
We harvested the password hashes as seen in the image on the left. There are two modules we can use to obtain the same password hashes. The credential_collector module collects password hashes as well as user tokens while the hashdump module collects only the password hashes. The password hashes are of the LM & NTLM hash types respectively. For our purposes, the password hashes are adequate.
.png)
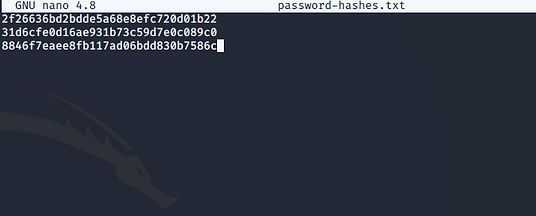
Creating a password hash list
The extracted password hashes are pasted into a text file. Each hash here is of the NTLM hash type (the second hash value from the previously extracted password hash entries).
.png)
.png)
Password hash cracking
Having collected these password hashes, we will attempt to crack them to obtain the weaker passwords.
We can use an online tool called CrackStation to compare our hashes with hashes of common weak passwords. However, for larger numbers of password hashes, this will prove impractical.
Password cracking via Hashcat
Kali Linux has a powerful tool called Hashcat that allows for cracking password hashes using wordlists.
The wordlist we used in this case was “default_pass_for_services_unhash.txt”. However, more comprehensive wordlists like “rockyou.txt” can be used for larger scale projects.
.png)
.png)
Final step
In the following command, we have set hash type (-m) to 1000, which represents NTLM. We have also set the file paths for the file with hashes to crack, the wordlist as well as an output file to store the cracked passwords.
Results
We can observe that 2 of the 3 hashes were successfully cracked.
The passwords cracked are placed in the output file along with their original hash value. We now know that the password is “password” for the user “augus” and an empty password for the user “Guest”.
.png)
Capturing Keystrokes
.png)
Being able to collect only the weak passwords using the previous method, we have to look into other means.
One such method is to use the keylogging function available in Meterpreter.
Firstly, we will migrate to the “winlogon.exe” process to collect keystrokes while logging on to Windows. (We can migrate to “explorer.exe” to capture keystrokes when the victim is logging in on the browser.)
.png)
.png)
Starting a keystroke sniffer
Having migrated, we can start capturing keystrokes using the "keyscan_start" command
Entering password
On the victim machine, the password is keyed in for the Administrator account.
.png)
Results
The keystrokes have been obtained and we now have the password for the Administrator account. ("CiTaDe1@Capst0ne")
Pivoting Attack (Windows XP)
.png)
Preparing the route & exploit
We would define a route to the victim machine via the meterpreter session.
We would then select the MS17_010_PSEXEC module as the exploit, meterpreter/bind_tcp as the payload and we would define the settings as seen.
.png)
Executing the pivoting attack
We can simply enter 'exploit' and our attack will proceed, giving us a meterpreter session in the Windows XP machine. Our pivoting attack is complete.
Ransomware Attack (Windows XP)
.png)


Having obtained a meterpreter session on the Windows XP machine, we will perform a ransomware attack on it.
In our Windows XP machine, we have a folder on the Desktop with a text file in it, to test the ransomware with.
theZoo
For our ransomware, we would be obtaining it through installing theZoo, which is a repository of malware.
Selecting the malware
After starting theZoo, we can enter 'list all' to view the available malware we can use for our attack.
Selecting WannaCry
We would be using WannCry, which is identified as malware 290.
Obtaining WannaCry
We enter 'use 290' to specify WannaCry. We then use 'get' to download the malware into our Kali Linux.


Setting a password
We can edit the Ransomeware.WannaCry.pass file to change the password for the zipped WannaCry file.


Getting the executable
We can then unzip the zip file the malware is in and enter the password we had previously defined. We would then be renaming the malware to 'wannacry.exe'.

Uploading WannaCry
Using our meterpreter session with Windows XP, we would upload our malware to the Desktop.

Executing WannaCry
Using our meterpreter session with Windows XP, we would execute our malware using 'execute -f wannacry.exe'.
.png)
.png)
Files Encrypted
We can observe that new files have been created on the Desktop. When we enter the folder our test file was in, we can observe that the file has been encrypted.
.png)
Files Encrypted
When we open the decryptor file (Wana Decrypt0r), the background is changed and a window pops up with instructions on how to decrypt the files.
Our attack has succeeded and our hypothetical victim has to pay for their files back.
Performing Screen Captures

Screenshot command
In our Meterpreter session, we enter the 'screenshot' command to perform a screen capture.

Screenshot saved
The screenshot has been saved in our Kali Linux.
Event Log Deletion
.png)
.png)
Clearing our traces
The last step of our post-exploitation activities is to clear all of our traces of activity on the victim machine. We can achieve this by running the "clearev" command to clear all the Event Logs in the victim machine to cover our traces.


Results
We can now head over into the victim machine's Event Viewer and check that indeed all Security, Application, and System logs have been deleted and wiped out. This marks the end of our post-exploitation activities.